
Basic 2.0 Tutorial
This provides a very basic tutorial of how to create and submit a post using PostyBirb 2.X.X.
This is by no means comprehensive of all the functionality, but should be enough to help you create your first submission. I will expand on this tutorial if requested. I will also compile a list of online tutorials should anyone make one and tell me about it.
Some information may become out of date as updates are released.
User Made Tutorials
Bulk Posting: https://www.patreon.com/posts/27795435
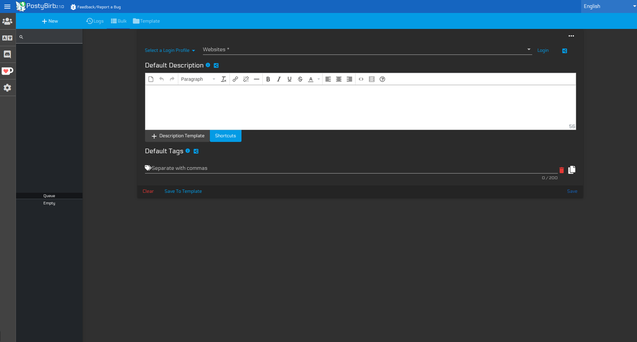
When you first start PostyBirb, you will be met with a screen that looks a bit like this.
Logging In
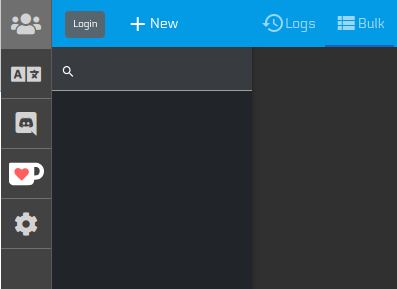

On the sidebar on the left, there is a button that opens the login panel. Clicking on the icon with 3 people will open the login panel.
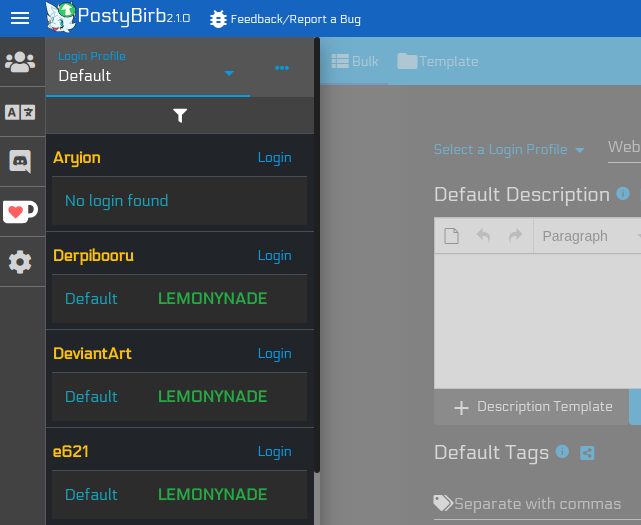
Once the panel opens, you can login to any of the websites that PostyBirb supports by clicking Login. If you are already logged into an account, it will show the Login Profile Name (Default) + Username (Lemonynade). By default a Default login profile is created for you.
Clicking on Login will open a dialog that asks you which login profile to use. Once you click yes, you will be brought to a login screen for the website. Once you finish logging into a website, close the dialog and after a couple seconds the application should show you as logged in to that website.
Tip: If you are already logged into an account. You can skip the Login Profile select step by clicking on the Login Profile Name + Username row to immediately open the dialog for the website and login profile.
Creating A Submission
To create a new submission, click on the +New button.
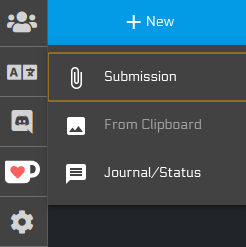
A menu will appear that will let you choose the type of submission to create.
Submission
A submission that takes a file such as an image.
From Clipboard
Creates a submission using an image that you have saved in your clipboard. This only supports Images.
Journal/Status
A submission that does not take any files. Not all websites support this type of submission.
For this tutorial, we are just going to create a new submission using one file, although you can select one or more files and it will create that many new submissions.
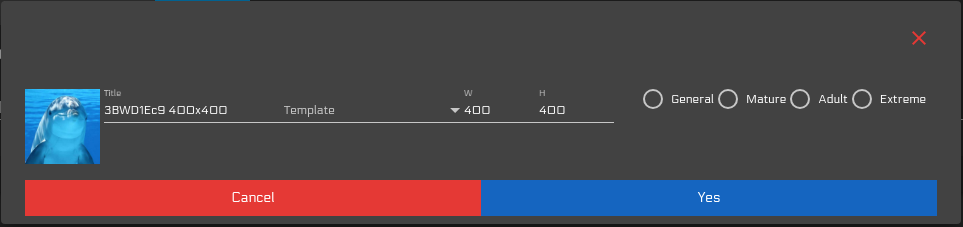
Once you select your submission file(s) a dialog will appear (this may take some time depending on the number and size of the files provided).
For each file provided you can specify the Title of the submission (defaults to the file name), a template, a width and height (it is suggested you do any cropping before importing into PostyBirb), and a rating.
All of these fields are optional and you do not need to fill them now.
Clicking Yes will create the submission(s) for you.
Editing A Submission
|
|
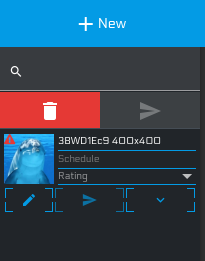
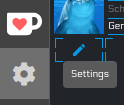
Once a submission has been created, you can begin to edit it by clicking on the pencil icon.
Alternatively, you can fill out information in the Bulk tab, click save, and select the submission you wish to apply the form to. This is generally suggested when you want to edit 2 or more similar submissions.
Notice: The submission thumbnail has a warning icon. This means that the submission is incomplete or has errors. A submission can not be posted or scheduled until these issues are fixed.
Once you click on the edit icon, a tab will be opened. While this tab is open, you can freely edit the submission.
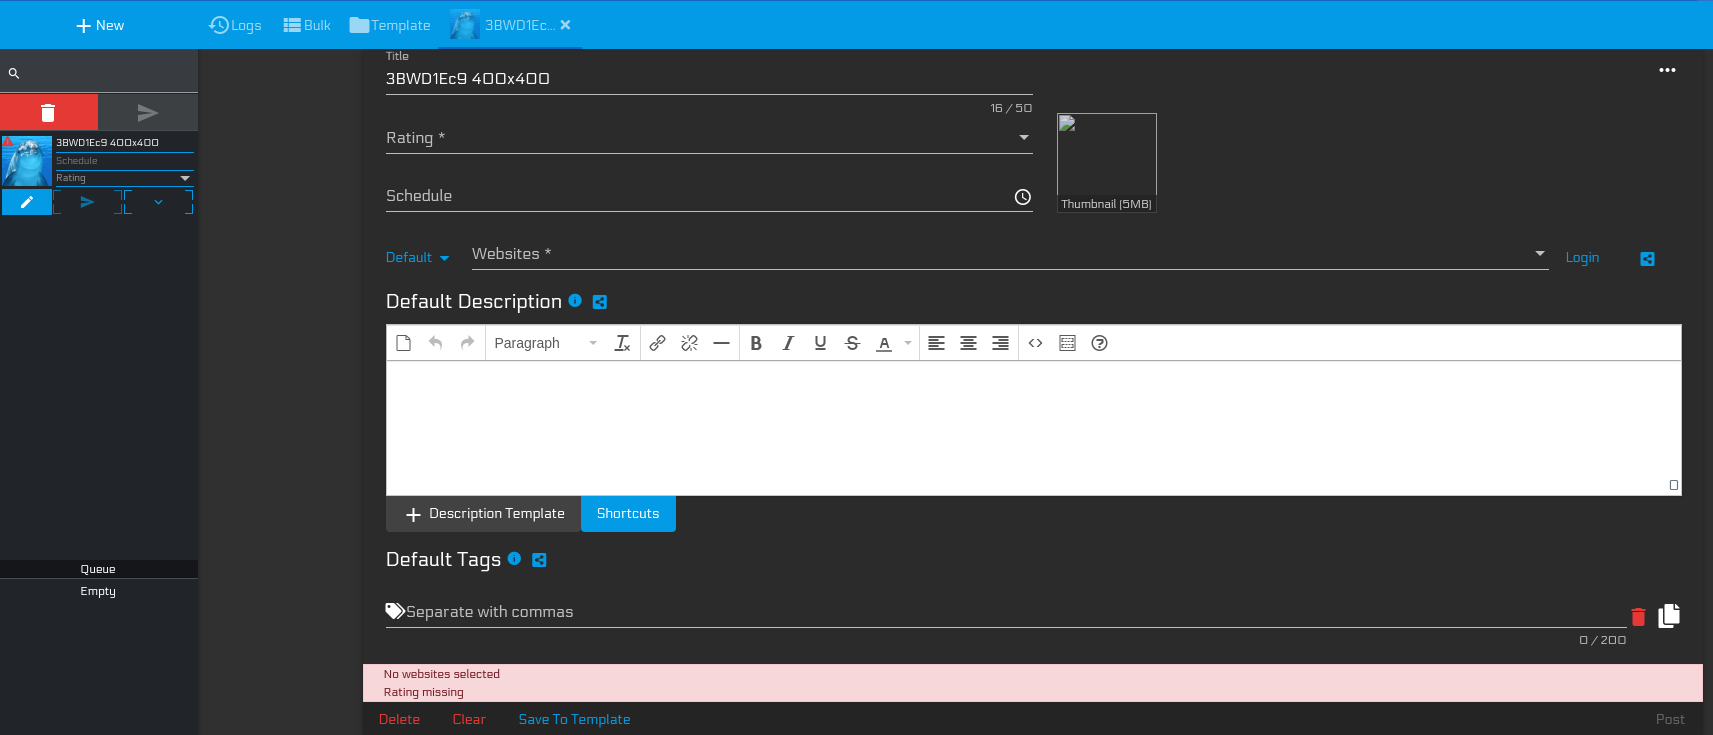
As you can see, this submission is incomplete since it is missing a rating and websites to post to.
Once you provide a rating and one or more websites to post to, these warning should go away.
Notice: Where it says Default next to Websites is the Login Profile that will be used for this submission. By default, this will be set to whatever is the default Login Profile set by a user when a submission is created. You can change it by clicking on the Blue text (in this case Default).
Alternatively, you can fill out information in the Bulk tab, click save, and select the submission you wish to apply the form to. This is generally suggested when you want to edit 2 or more similar submissions.
Notice: The submission thumbnail has a warning icon. This means that the submission is incomplete or has errors. A submission can not be posted or scheduled until these issues are fixed.
Once you click on the edit icon, a tab will be opened. While this tab is open, you can freely edit the submission.
As you can see, this submission is incomplete since it is missing a rating and websites to post to.
Once you provide a rating and one or more websites to post to, these warning should go away.
Notice: Where it says Default next to Websites is the Login Profile that will be used for this submission. By default, this will be set to whatever is the default Login Profile set by a user when a submission is created. You can change it by clicking on the Blue text (in this case Default).
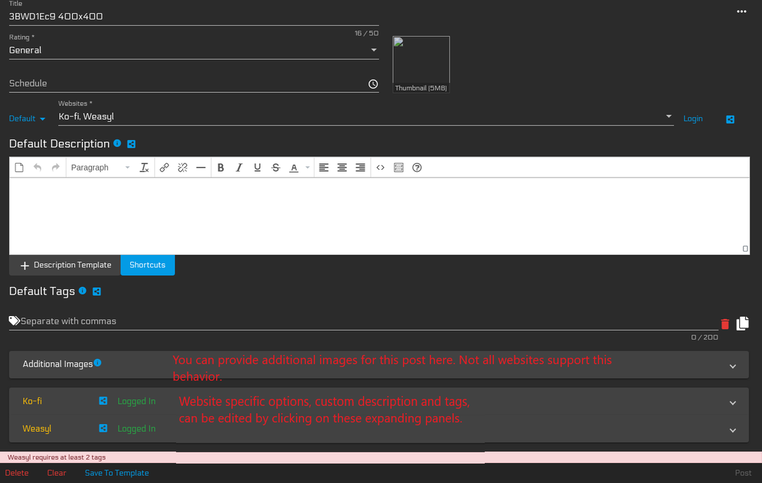
Once you select some websites you will be able to further edit and customize website specific options such as folders, notifications, and other website options, etc.
Notice: Some websites have specific requirements. In the example above, you can see that Weasyl requires at least 2 tags.
Once you are satisfied with the submission and all the warnings have been cleared, you have a few options.
Notice: Some websites have specific requirements. In the example above, you can see that Weasyl requires at least 2 tags.
Once you are satisfied with the submission and all the warnings have been cleared, you have a few options.
- You can immediately post the submission.
- You can stop editing it for now, and create/edit other submissions.
- You can Schedule the submission to post at a certain time.
- The application must remain on for this to happen. By default if a submission is scheduled, the app will remain open as a background process when you close the window. The application will terminate itself once all scheduled submission have completed. It must be noted that some website logins may expire if the application is left in a background state.
Scheduling A Submission (Optional)

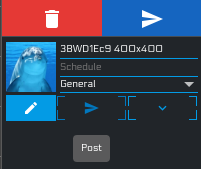
You may want to schedule a post to occur at a certain time. To do this, all you have to do is set a time you want it to post with the Schedule field.
Once you set a time to post, the icon next to the edit button will become a stopwatch. Clicking on this will officially schedule the submission.
Once you set a time to post, the icon next to the edit button will become a stopwatch. Clicking on this will officially schedule the submission.
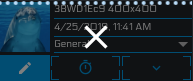
You can unschedule a submission by clicking on the X.
Posting A Submission
Once you are ready to post and the submission has no warnings, you can post the submission from 3 different places.
Notice: Submissions will post in the order that they are submitted. If you want to specify a posting order, you can do this by clicking on the large Post button, which opens a dialog that lets you choose which submission(s) to post, as well as allowing you to set up a post order (top to bottom) by dragging the submissions.
- Within the submission editing form where it says Post.
- Clicking the arrow icon next the edit icon.
- Clicking the large arrow icon at the top of the submission section (next to the large red trashcan).
Notice: Submissions will post in the order that they are submitted. If you want to specify a posting order, you can do this by clicking on the large Post button, which opens a dialog that lets you choose which submission(s) to post, as well as allowing you to set up a post order (top to bottom) by dragging the submissions.

Setting post order
Once you confirm the post, it will be disabled in the sidebar while it attempts to post.
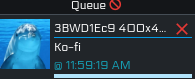
You can see the website that it is currently attempting to post to underneath the title.
Below that is the time at which the post will occur (meaning that the app is waiting for some timing condition). This time can sometimes be a few minutes ahead for websites that do not allow frequent posts to occur through PostyBirb such as Pixiv which requires at least 10 minutes between each post.
Cancelling A Post
There are currently 3 ways to cancel a post that has been queued.
Notice: Cancelling a submission that is in the process of posting to a website will not cancel until the post to that website completes. This is due to the fact that cancelling an in-flight submit is not well supported at this time.
You can see the website that it is currently attempting to post to underneath the title.
Below that is the time at which the post will occur (meaning that the app is waiting for some timing condition). This time can sometimes be a few minutes ahead for websites that do not allow frequent posts to occur through PostyBirb such as Pixiv which requires at least 10 minutes between each post.
Cancelling A Post
There are currently 3 ways to cancel a post that has been queued.
- Clicking on the big X that appears over the disabled submission in the submission section.
- Clicking on the red X next to the title of a submission in the queue.
- Clicking on the Cancel button next to Queue.
- This will cancel and empty all submissions currently in the queue.
Notice: Cancelling a submission that is in the process of posting to a website will not cancel until the post to that website completes. This is due to the fact that cancelling an in-flight submit is not well supported at this time.
When A Post Completes
There are two things that can happen when a post completes.
Fail
A post that fails to send to one or more websites will be removed from the queue. This typically means that either the website is no longer logged in, the website is unreachable, or some error occurred either within PostyBirb or on the website's end.
These reasons are saved in a log that can be found in the Logs tab section (only keeps track of the last 10).
If you believe there is an error, feel free to contact me and send me the error log.
Any website's that were successes will be removed from the list of websites so that it doesn't re-post.
Success
A post that succeeds will be removed from the queue and deleted. The queue will then move on to the next submission if there are any.
If this happens, congratulations! You have successfully created and posted a submission using PostyBirb!
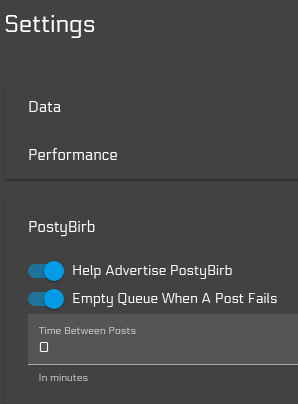
Post Settings
Although I won't go into detail about the possible settings you can set for a post, you can modify the behavior of how PostyBirb will attempt to post submissions.